Portal Migrator

Purpose

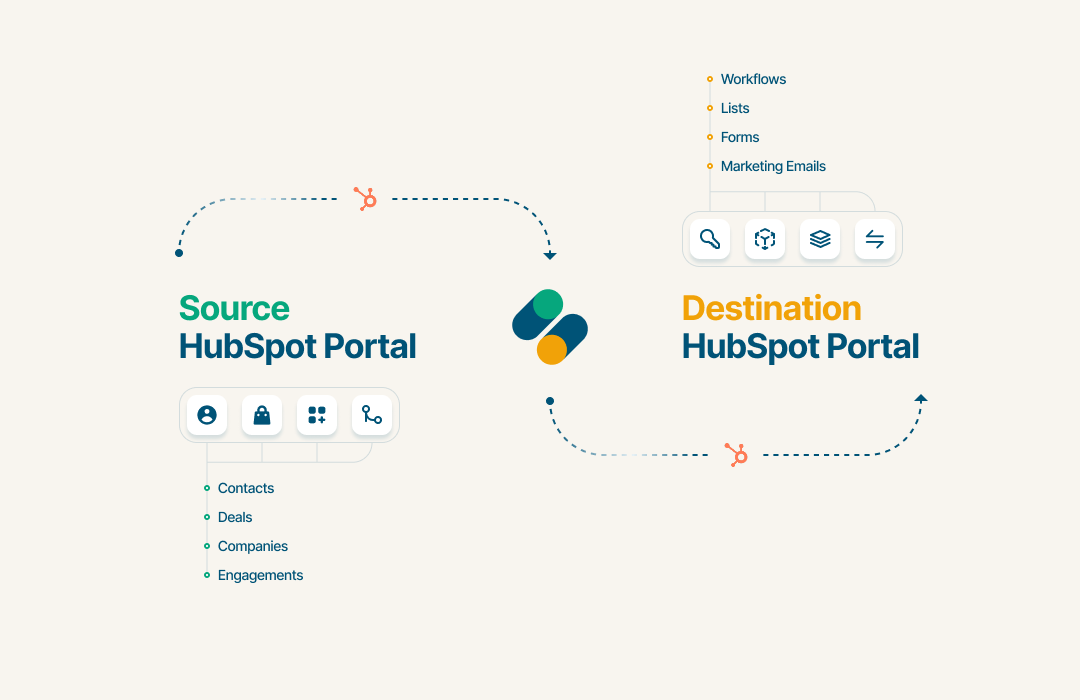
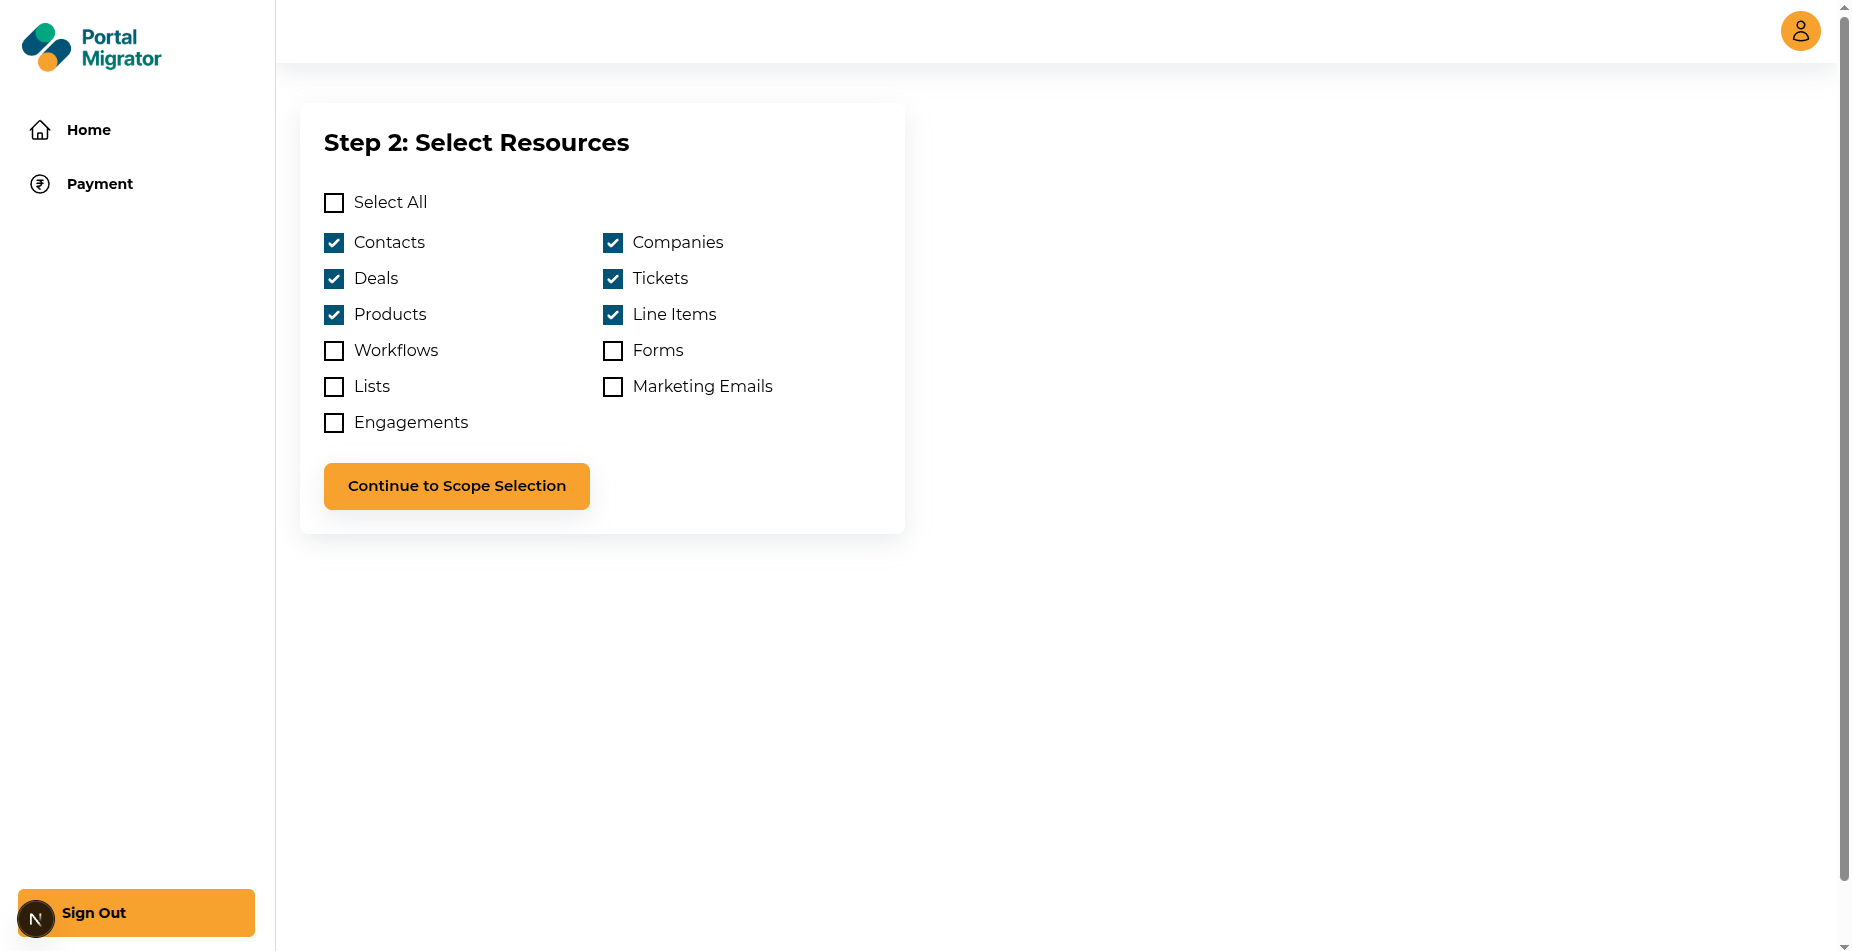
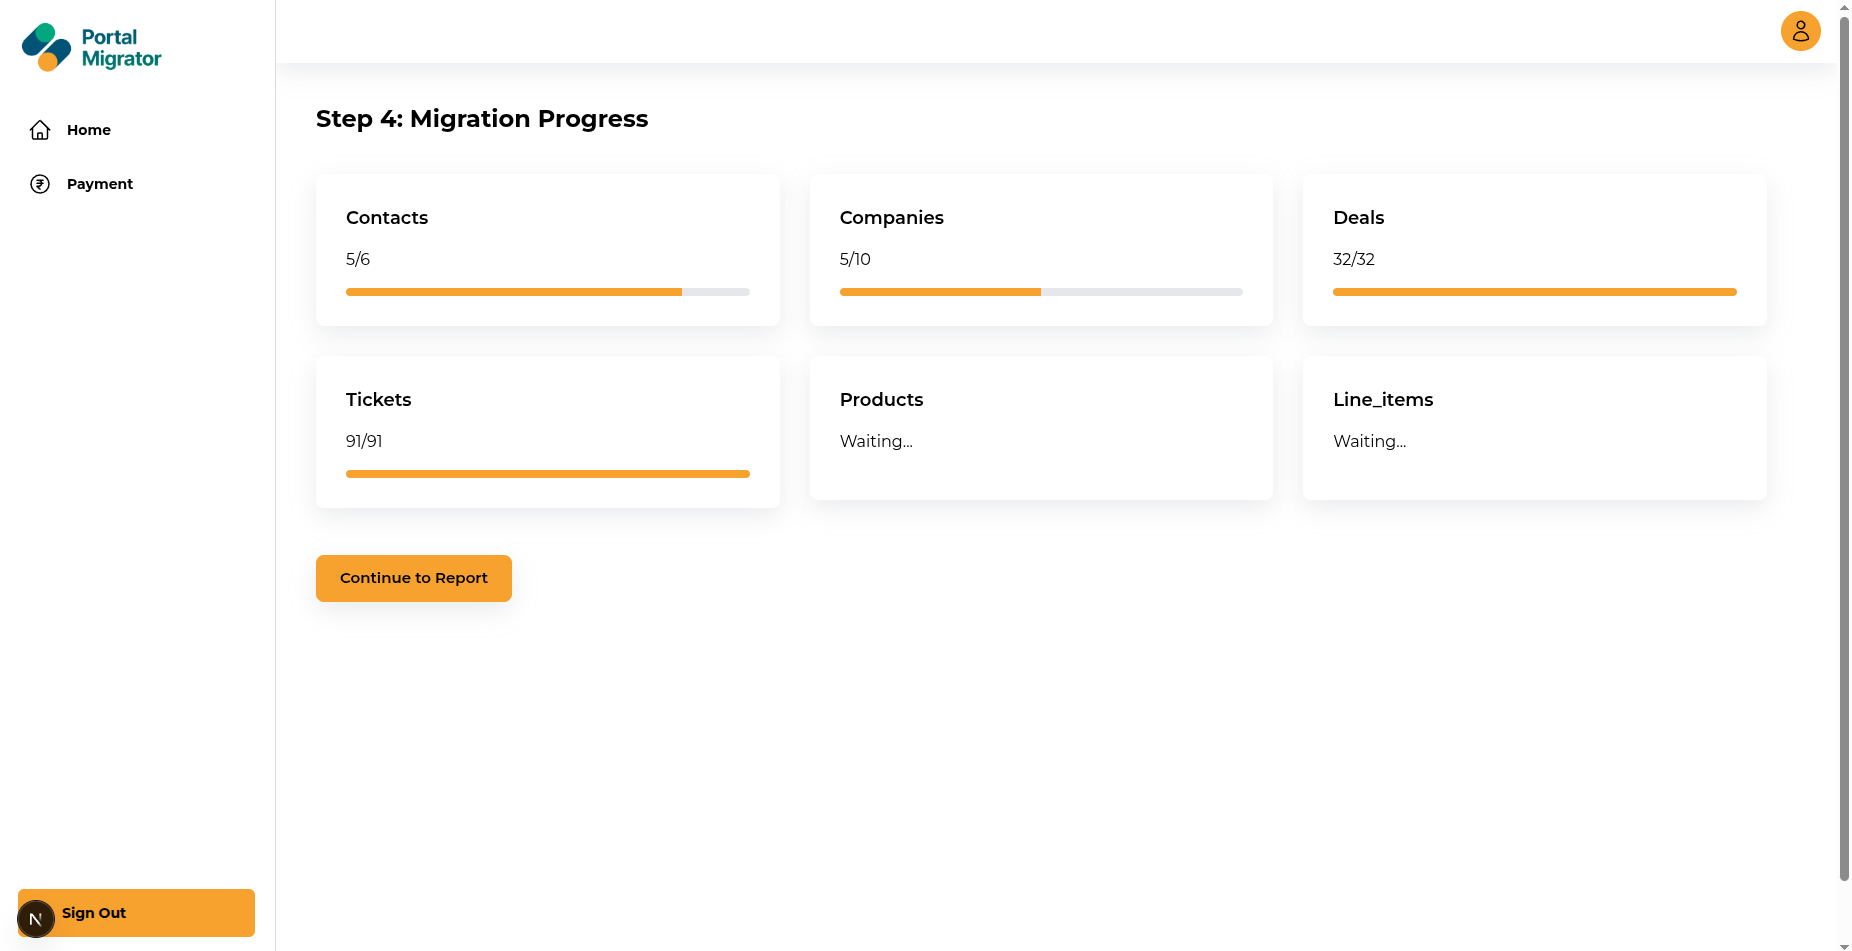
The Portal Migrator Tool is built to simplify and streamline the process of transferring data between two HubSpot portals. Whether you're consolidating CRM data, migrating from a test or sandbox environment to production, or re-platforming due to organisational changes such as mergers or rebranding, it supports the migration of key HubSpot objects, including contacts, deals, emails, workflows, lists, and more, while preserving relationships and properties. After migration, a summary shows success, failure, and skipped counts, with detailed error insights. You can also download an Excel report for audits and troubleshooting, ensuring a smooth, transparent migration process.

pin.svgNote: This package allows only two complete migrations.

Prerequisites

Before starting, ensure you have:
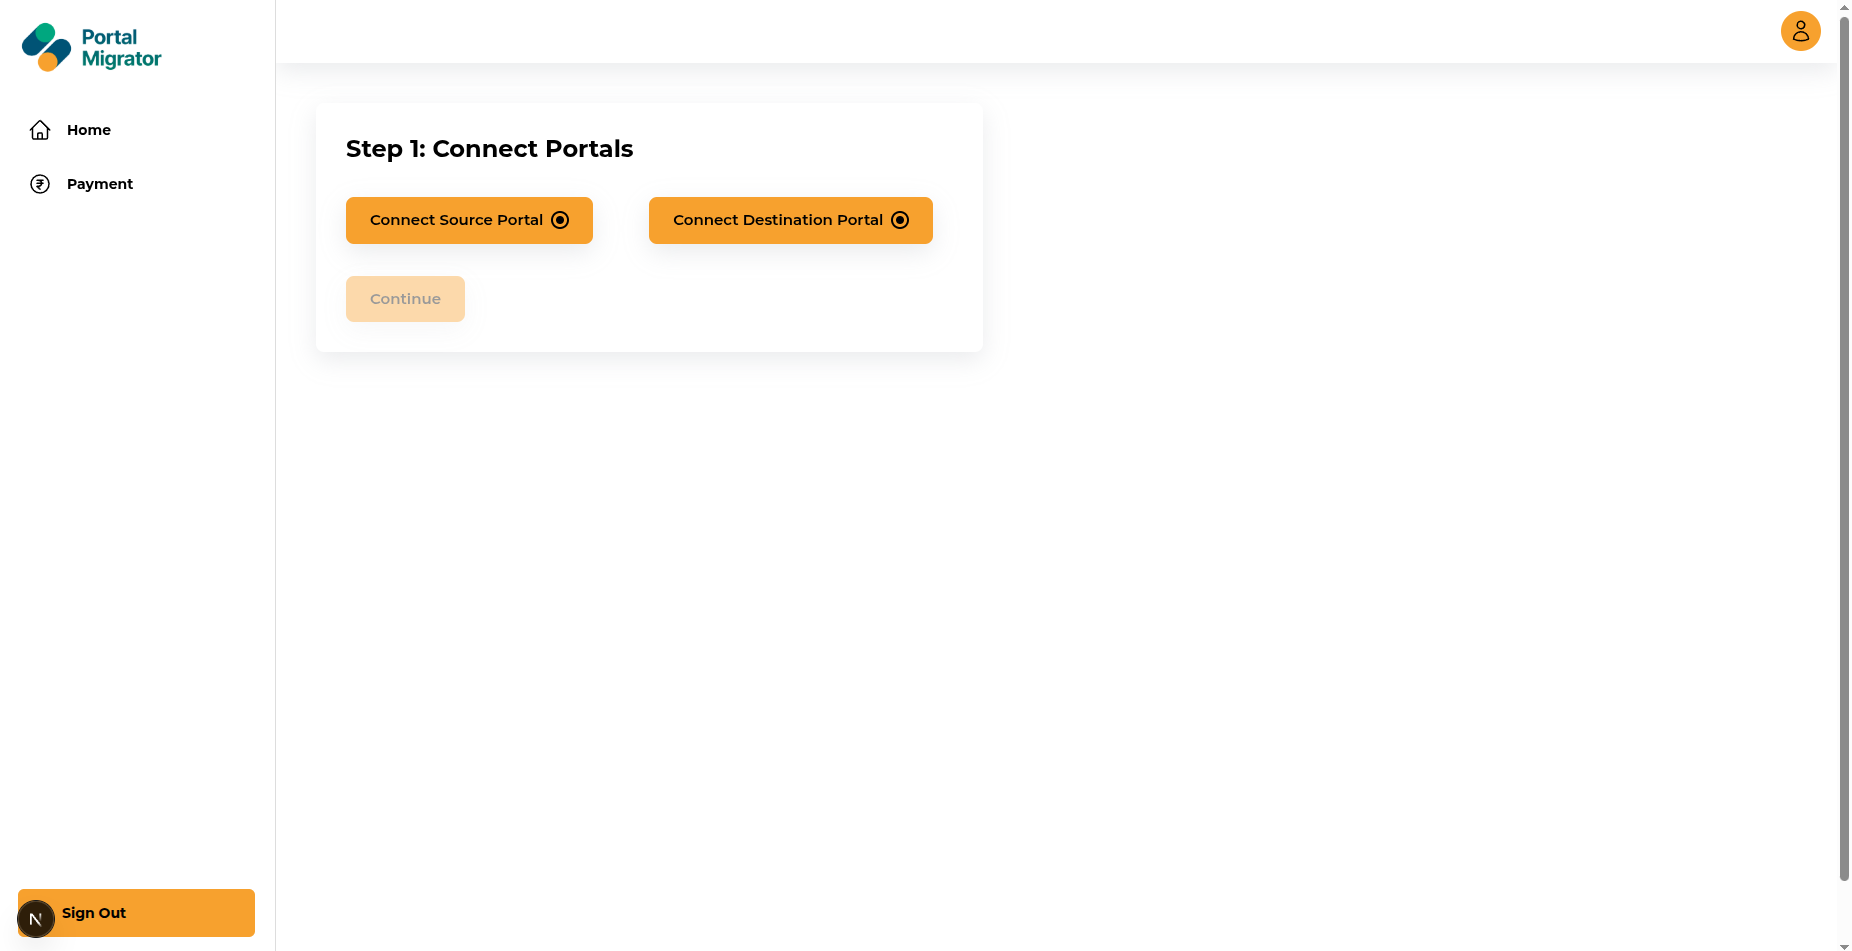
  • Access to both Source & Destination HubSpot Portals
  • Super Admin or Equivalent Permissions on both portals
  • HubSpot Marketing or Sales License (depending on object types)
Flow Iteration 1-1

1. Log in to the Tool

Open: https://hubspotportalmigrator.hubresolution.com/dashboard

Enter your email and password to access the dashboard.

2. Connect HubSpot Portals

You'll be prompted to connect two portals via HubSpot OAuth:

  • Source Portalright-arrow Existing data
  • Destination Portal right-arrow New portal for migrated data

“Authorize both accounts.”

Once connected, you'll see green indicators confirming portal linkage.

Portal selection

3. Select Data to Migrate

Choose the objects you want to migrate:

  • Contacts, Companies, Deals, Tickets
  • Line Items, Lists, Forms
  • Workflows, Emails, Engagements

“Click 'Start Migration' to begin.”

User, property, and relationship mappings are handled automatically.

Resource selected

4. Track Migration Progress Live

You're redirected to the Migration Progress Dashboard:

For each object, view:

  • Total records
  • Live migration count
  • Status (with true-icons indicator)

Progress updates in real-time, no page refresh needed.

Migration progress

5. View Migration Summary

Once migration completes, you're redirected to the Summary Page, which shows:

  • Record count per object
  • Status:trueiconsSuccess |closeFailed |alertsSkipped
  • Expandable error messages (per object)

6. Download Excel Report

  • Overview Sheet right-arrow Summary of each object
  • Error Tabs right-arrow for any failed/skipped records

Use this report for internal documentation or troubleshooting.

Download Report overview

7. Download report error details

After migration, download an Excel report with record counts, success/failure rates, and a dedicated error details tab. Easily review failed records with exact error messages for quick troubleshooting.
Download report error detials

1.1 Post-Migration Guide:

Re-Running a Migration

You can rerun the migration for specific objects anytime:

  1. 1. Go to the Dashboard
  2. 2. Reconnect HubSpot portals if needed
  3. 3. Select the object(s) to rerun.
  4. 4. Click Start Migration

1.2 Tips for Best Results

  • Verify permission levels are the same on both platforms.
  • Subscription should be higher or the same on the destination portal.
  • Make sure all active users from the source portal are present on the destination portal.
  • For errors:
    1. Expand the accordion section
    2. Or download the detailed Excel report

1.3 Troubleshooting & Support

If the migration fails or behaves unexpectedly:
  • Confirm both HubSpot portals have proper schema & permissions
  • Make sure OAuth connections are active
  • Re-run the specific object and check the error logs

1.4 Appendix

  • Successfull migratedSuccessfully Migrated
  • Failed recordFailed Record
  • SkippedSkipped (Due to validation or missing data)
  • Re-runningRe-running Migration